As a flute teacher with over 14 years of experience, I’ve guided countless students through mastering the art of trilling on the flute. In this article you’ll see flute trill chart fingering for all trills.
Here are my 3 top tips for practicing trills:
- Start Slowly: Begin practicing your trills at a slow tempo to ensure accuracy and clarity. This foundational step helps in building muscle memory and coordination between your fingers. As you become more comfortable, gradually increase the speed while maintaining control and precision in your finger movements.
- Use a Metronome: Incorporating a metronome into your practice sessions is crucial for developing consistent timing and rhythm in your trills. Start with a comfortable beat and as your confidence grows, challenge yourself by adjusting the metronome to faster tempos. This will help you achieve evenly spaced, rhythmically sound trills.
- Focus on Finger Independence: Trills require quick, independent finger action. To enhance this, isolate the fingers involved in the trill and practice moving them independently from the rest of your hand. Exercises that strengthen finger independence will improve your agility, making your trills smoother and more effortless.
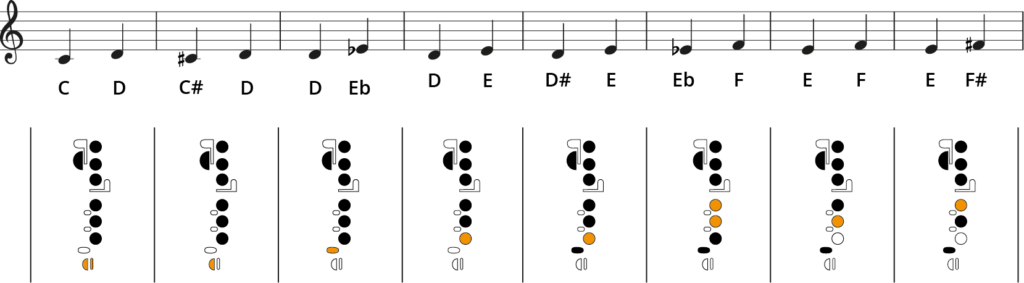
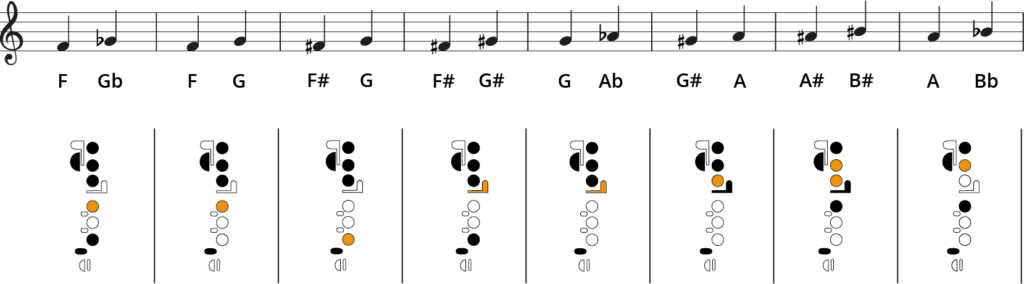
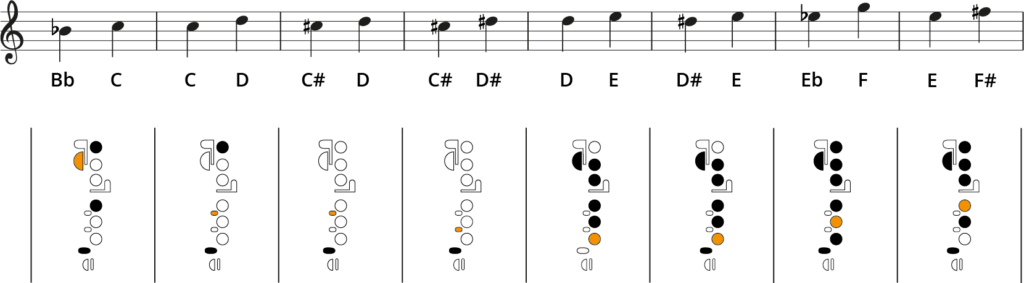
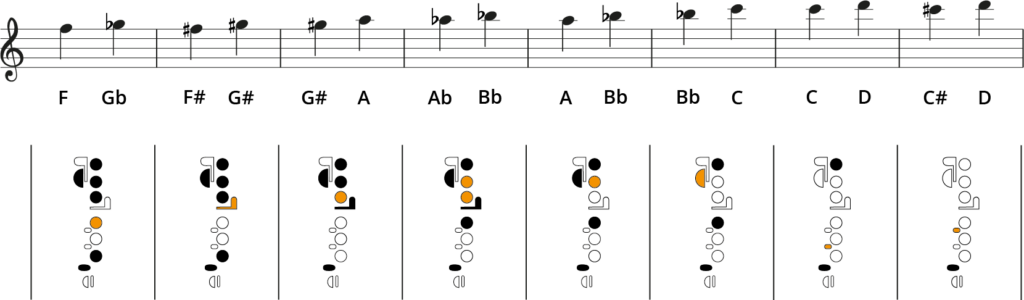
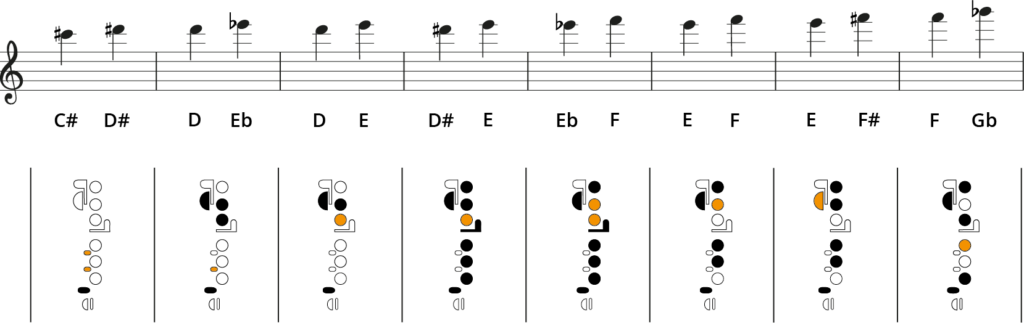
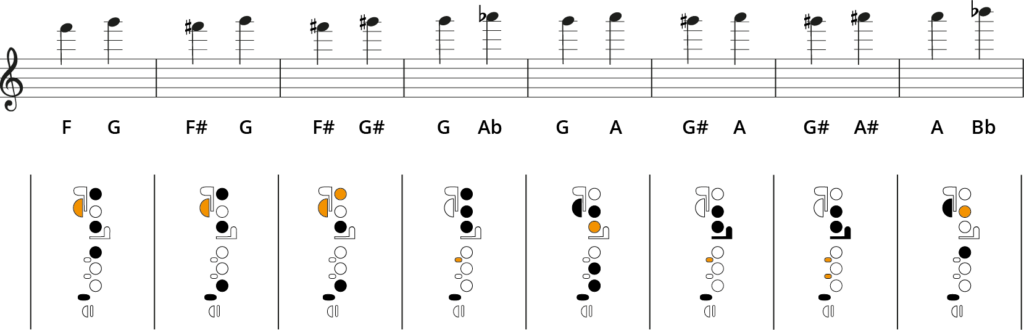
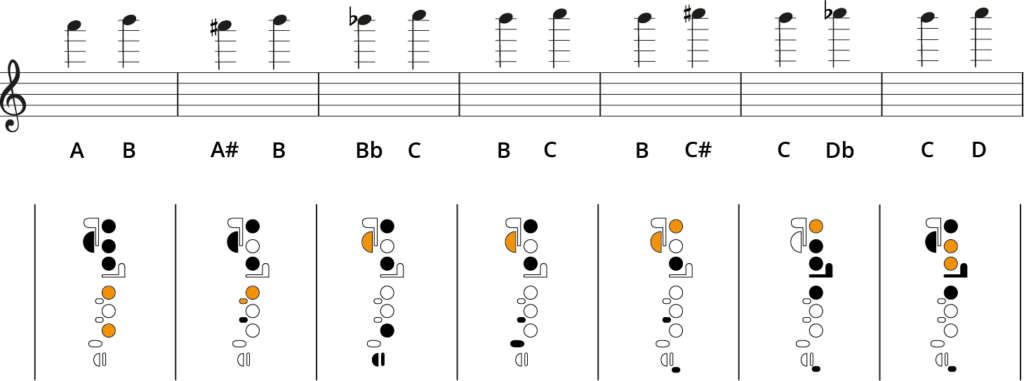
Flute Trill Chart
What’s next…?
- Check out the our Complete Flute Chart
- Learn your high notes with our Flute Chart for High Notes